
AURORA AUSTRALIS: What you need to know
To see, let alone capture one of nature’s most incredible phenomena is one of the most exciting forms of night sky photography! The often elusive lights will challenge every part of your photographic experience as capturing the aurora is often a combination of perfect planning…and maybe mixed with a little bit of good luck!
If you have ever wondered how we plan and capture our images and how to read and understand all those fancy gauges on the apps which are a crucial part of the process, then follow along as we comprehensively break down all the what’s, why’s, where’s and how’s to have you capturing epic aurora images for yourself!

WHAT IS THE AURORA?
Auroras are directly caused by solar activity, specifically from Coronal Mass Ejections (CMEs), Coronal Hole High Speed Streams (CH HSS), and Filament Eruptions (also CMEs) from the sun, which emit vast streams of charged particles and solar wind. Upon interacting with Earth's Magnetic Field (EMF) and atmosphere, (thermosphere) these particles produce vivid displays of coloured lights in the night sky.
There are two types of auroras: the Aurora Borealis or Northern Lights, visible from high to mid-northern latitudes, and the Aurora Australis or Southern Lights, visible from low to mid-southern latitudes, which is what we see here in New Zealand.
Auroras predominantly occur at high latitudes near the Earth's poles due to the Earth's magnetic field, as the Earth is surrounded by a geomagnetic field, which extends from the planet's interior out into space, which is where it meets the solar wind.

The specific colours, shapes and patterns of an aurora are determined by the speed, density, type of gas particles involved and their altitude. For example, oxygen at higher altitudes can produce a rare red aurora, while lower altitude oxygen gives off a more common green colour. Nitrogen molecules can produce blue or purplish-red auroras.

WHEN IS THE BEST TIME TO SEE THE AURORA?
Solar Cycle:
The solar cycle, also known as the sunspot cycle, is an approximately 11-year cycle that describes the periodic change in the Sun's activity and appearance, including variations in the number of sunspots, solar flares, and other solar phenomena. This cycle is driven by the Sun's magnetic field, which undergoes a complete reversal during each cycle. The peak of activity in the Solar Cycle is called the Solar Maximum and at the trough of the cycle, the Solar Minimum.
We are currently in Solar Cycle 25 (SC25) where the Solar Maximum is estimated to fall between mid 2024 to mid 2025.
The aurora can be seen at any time of the year depending on your location, but the best time to see an aurora depends on several factors including location, time of year, and solar activity. Here are some general guidelines to optimise your chances of witnessing this natural spectacle:
Geographic Location:
The South Island: The South has some great locations for aurora chasing and the further south you go, the better your chances will be. For North Islanders, the same rule applies.
Time of Year:
Equinoxes: Auroral activity tends to be higher around the equinoxes in March and September due to the position of the Earth's axis relative to the Sun, which can enhance geomagnetic activity.
Winter Months: The simple fact is that there are far more hours of darkness than in summer, which corresponds to May through to September.
Time of Night:
True Darkness: Auroras can peak at any time, day or night, depending on solar activity. The best viewing times are during the dark hours, from evening nautical twilight to morning nautical twilight, when the skies are darkest and the lights are most visible. While they can often be seen around midnight, auroras can actually appear from dusk till dawn.
Solar Activity:
Solar Cycle: (as expanded above) The aurora is linked to the 11-year solar cycle and years around solar maximum, when the Sun is most active, can increase the frequency and intensity of auroral displays.
Real-Time Solar Activity: Monitoring real-time solar activity and geomagnetic forecasts can help predict when auroral activity is likely to be higher. Websites and apps that provide space weather forecasts can be valuable resources.
Weather Conditions:
Clear Skies: This is THE single biggest factor in Aurora chasing! Cloud cover can obstruct views of the aurora, so it's important to choose a location with clear skies.
Light Pollution: For the best viewing experience, find a location far from city lights and other sources of light pollution.
Moon Cycle:
Dark nights: Shooting in the darkest part of the moon cycle, around the New Moon, will give you the best chance for the darkest skies. The brightness of the moon plays a crucial role in how much aurora will be visible and what colours will be seen and captured.
While these guidelines can increase your chances, the aurora remains a somewhat unpredictable phenomenon. Space agencies NASA and NOAA have great prediction models that predict with good accuracy the strength of incoming geomagnetic activity, but with 93 million miles between the Earth and the sun, there are often factors you just can’t predict!
UNDERSTANDING THE 5 AURORA PARAMETERS

When predicting aurora visibility, several space weather parameters are important, which will give you a better chance at success. The 5 you need to understand include: the Kp index, Speed, Bz, Density, and Bt. Here's what they mean in the context of aurora forecasting:
1. Kp Index:
The Kp index measures geomagnetic activity on a scale from 0 to 9, with higher values indicating more intense geomagnetic storms. Higher Kp values increase the likelihood of auroral displays and their visibility at lower latitudes. There are 2 forms of KP on some apps, Observed (current) & Predicted (future)
Observed - the latest magnetometer (an instrument used to measure the strength and direction of magnetic fields) measurement
Predicted - the estimate of what the KP might be based on data from NASA’s ACE Satellite (Advanced Composition Explorer).
2. Speed:
This refers to the speed of the solar wind, measured in kilometers per second (km/s). Faster solar wind speeds can enhance geomagnetic activity by more effectively transferring energy from the solar wind into Earth's magnetosphere, potentially leading to stronger auroras.
3. Bz Component:
Probably the most important parameter of them all, the Bz component is part of the Interplanetary Magnetic Field (IMF) and measures the direction of the magnetic field just upstream of Earth in the solar wind. It is measured in nanoTeslas (nT). A southward Bz (negative Bz) facilitates the merging of the solar wind's magnetic field with Earth's, enhancing geomagnetic activity and increasing the chances of auroral displays.
Essentially, the lower the Bz value, the larger the aurora.
4. Density:
This refers to the density of the solar wind, measured in particles per cubic centimeter (particles/cm³). Higher densities mean more charged particles are available to interact with Earth's magnetosphere, potentially leading to increased auroral activity.
5. BT (Total Field or Total Intensity):
Bt represents the total strength of the Interplanetary Magnetic Field (IMF) near Earth, measured in nanoTeslas (nT). It combines all components of the magnetic field in the solar wind. A stronger Bt can enhance geomagnetic disturbances, contributing to the likelihood and intensity of auroras.
Understanding these parameters will help you predict when and where auroras might be visible and assess the potential strength of auroral displays, ie knowing when to chase or when to stay home!

WHERE TO SEE THE AURORA?
The general rule here in New Zealand or anywhere in the Southern Hemisphere, is to be as far south as possible with an unobstructed view to the southern horizon and as far away from cities or light pollution as possible. We reckon the best places to see the aurora in New Zealand are:
South Island:
Stewart Island/Rakiura: This is one of the best spots in New Zealand for aurora viewing, as it lies further south and has very little light pollution. Stewart Island is also designated as a Dark Sky Sanctuary, making it an ideal location for observing the night sky.
The Catlins: Located on the southeastern coast of the South Island, the Catlins offer remote and dark beaches that provide excellent backdrops for aurora watching. Nugget Point is a particularly popular spot within the Catlins.
Mackenzie Country: Some of the darkest skies in New Zealand reside here and make it one of the more accessible and varied locations for aurora. Twizel and Ohau are notable locations as is around Lake Pukaki
Lake Tekapo: While Lake Tekapo is more famous for its stargazing due to the Aoraki Mackenzie International Dark Sky Reserve, its clear skies and minimal light pollution also make it a good location for spotting the Southern Lights, especially from areas with a clear view towards the south.
Christchurch: Anywhere high up the Port Hills offers great views south as does along any number of beaches out east. Lake Ellesmere and Birdlings Flat are both popular places to see.
Dunedin: On the Otago Peninsula, just outside Dunedin, there are several spots with low light pollution and good southern exposure, ideal for aurora viewing. Hoopers Inlet, Sandfly Bay, and Blackhead Beach are notable locations.
Invercargill and Bluff: Being at the southern end of the South Island, Invercargill and the nearby town of Bluff offer good opportunities to see the aurora. Stirling Point and Oreti Beach, in particular, provide expansive southern views.
Queenstown and Wanaka: While these locations can be affected by light pollution, finding a dark spot away from a town centre can offer a chance to see the aurora, especially when there's strong geomagnetic activity. Up the Remakables, Coronet Peak, or any high vantage point is great, as is anywhere along the Lake Wakatipu lakeshore.
Mount Cook/Aoraki: The national park offers dark skies and stunning landscapes, making it a potential spot for viewing the aurora during strong solar events, despite it not being as far south as other locations. Elevation at this location plays a more vital role than others in seeing the lights.
Westcoast/Westland: Surprisingly, one of the places you might not typically consider for aurora viewing is actually quite promising during nights of high geomagnetic activity. There are several locations offering spectacular southern views over the Southern Alps, making this one of the more underrated areas for capturing the lights. From Punakaiki to Haast, you'll find numerous great vantage points
North Island
Wellington: on nights of high activity the South Coast of Wellington has become a great place for North Islanders to see the aurora.
Taranaki / Central Plateau: On nights of very high activity, at these locations, the aurora can be captured but is not seen easily by the naked eye.
Auckland: On nights of very high activity, the aurora can be captured on the west coast but is not easily seen with the naked eye.


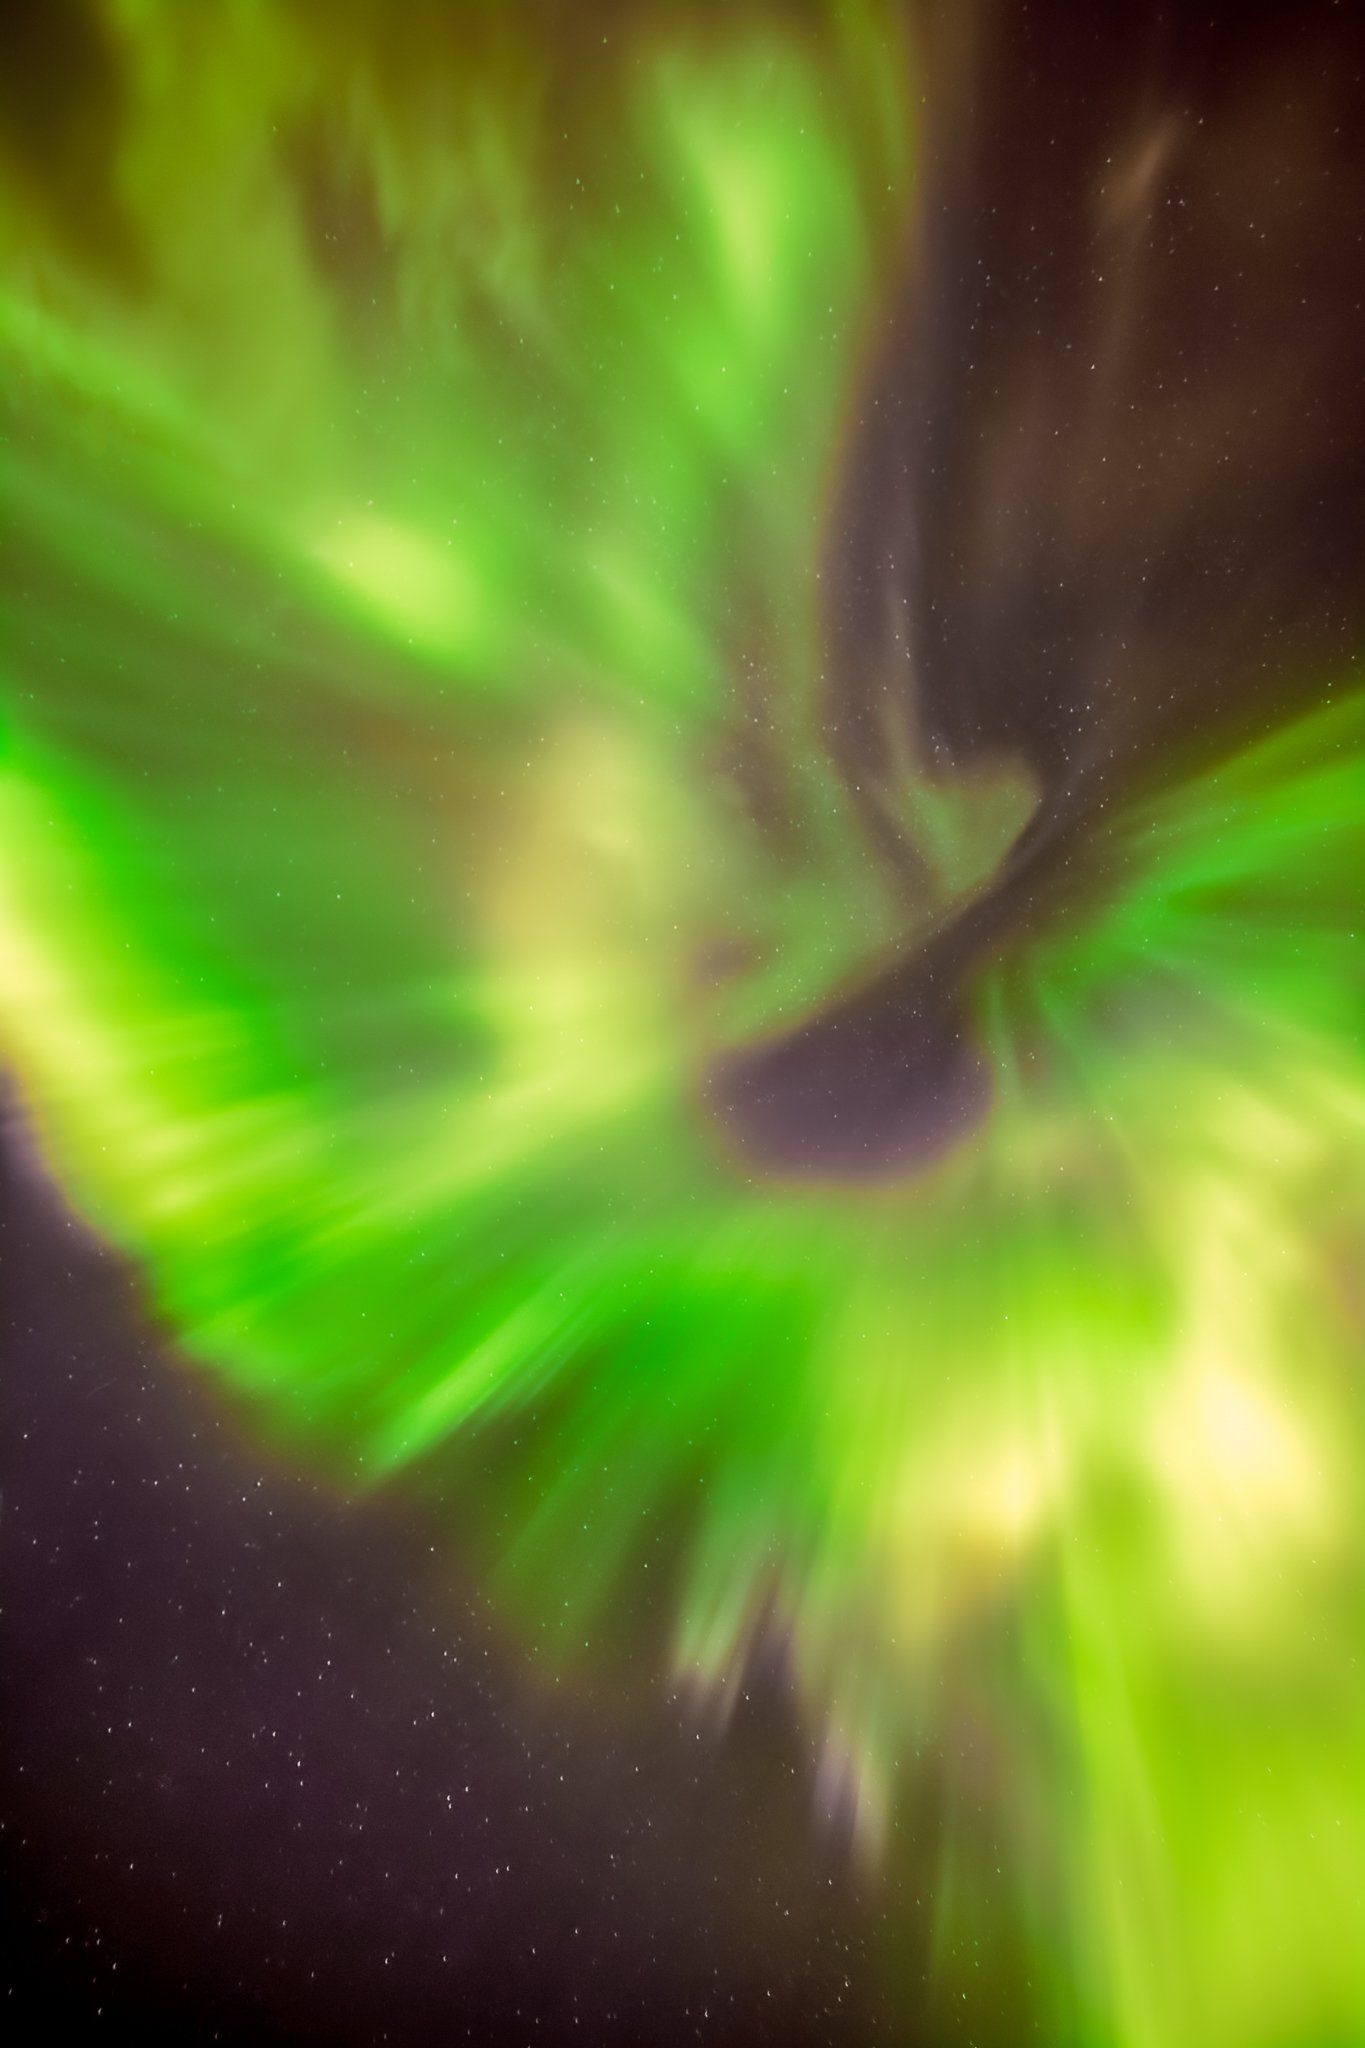


Gallery of the Northern & Southern Lights
HOW TO SEE THE AURORA
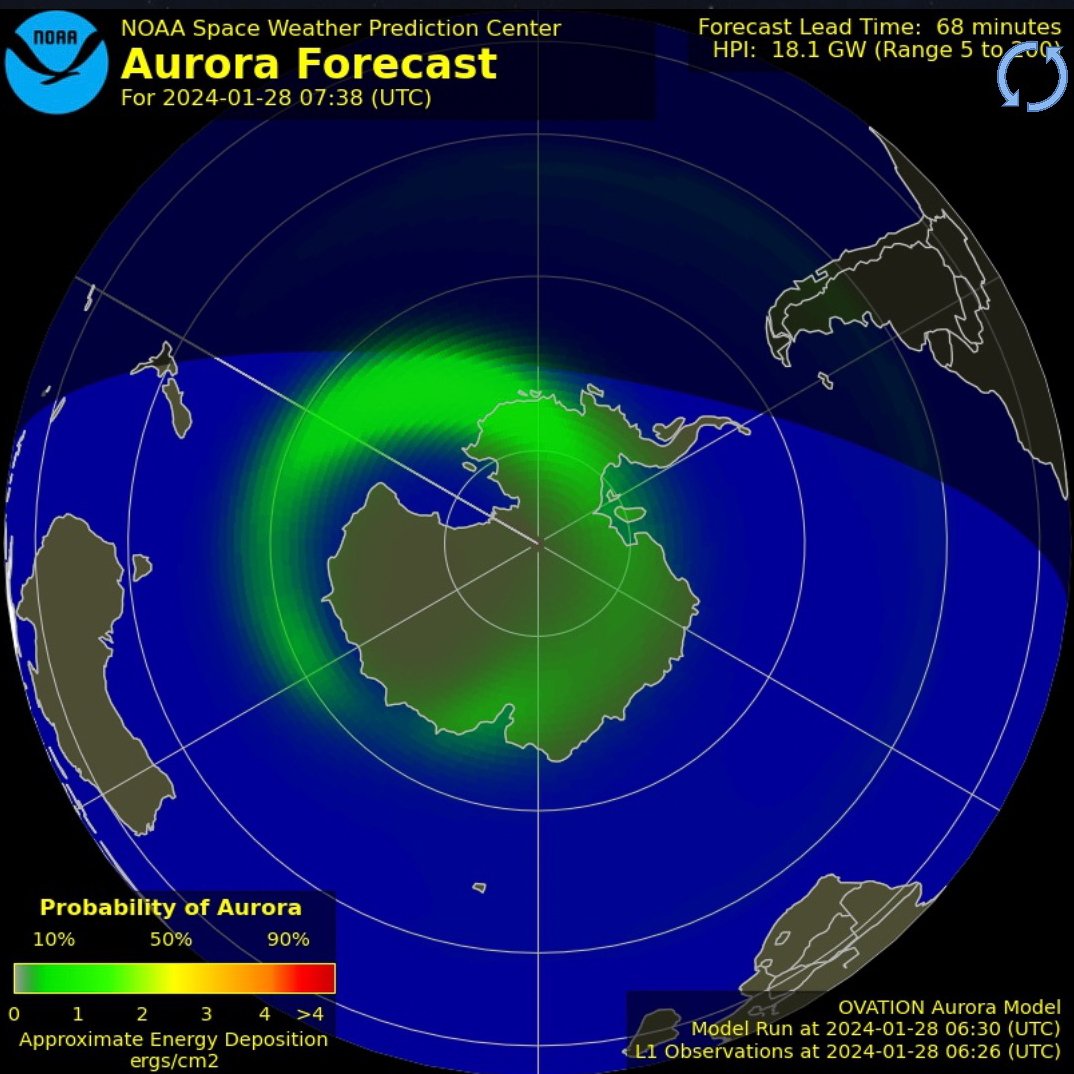
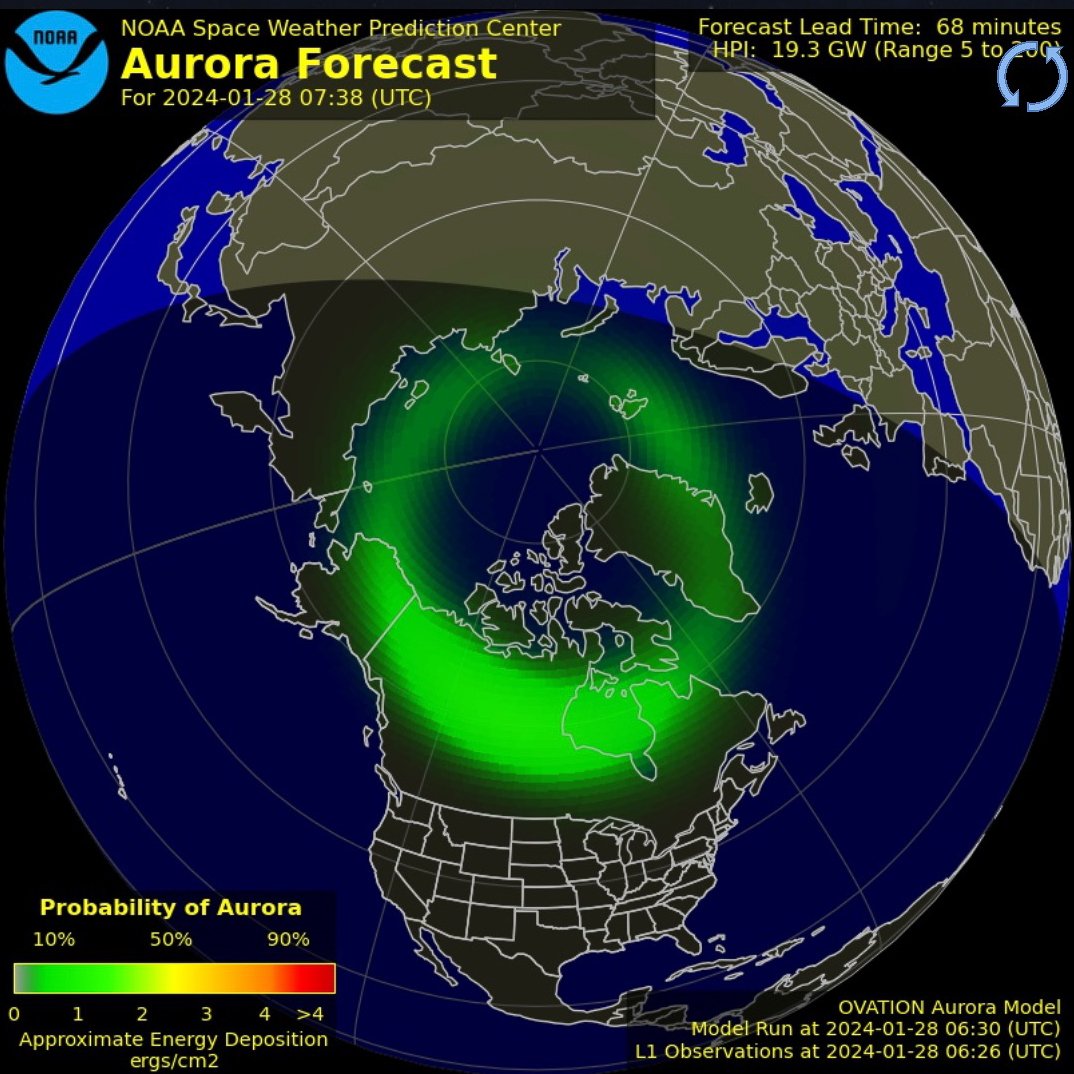
When planning to view the aurora in New Zealand, it's important to monitor space weather forecasts and aurora alerts, which can provide information on when auroral activity is likely to be high. Monitoring aurora activity effectively involves keeping track of space weather conditions and geomagnetic activity in real-time, which can indicate potential aurora displays. Here are some of the best ways we recommend to stay informed:
1. Aurora Forecast Services:
Websites and apps dedicated to aurora forecasts can provide predictions on auroral visibility. The ones we typically use are Space Weather Live, Aurora Alerts & Aurora Forecast.
2. Space Weather Websites:
Platforms like SpaceWeatherLive.com provide updates on solar flares, coronal mass ejections (CMEs), and other solar phenomena that could lead to auroral activity.
3. Geomagnetic Activity Indices:
Keep an eye on the Kp index, a scale that measures geomagnetic activity. A higher Kp index (5 and above) suggests a higher chance of auroral displays, potentially extending to lower latitudes.
4. Solar Wind and Magnetosphere Monitors:
Tools and websites that monitor the solar wind and the state of the Earth's magnetosphere in real time can provide early indications of increased auroral activity. The NOAA Space Weather Prediction Center offers such data.
5. Aurora Alert Systems:
Sign up for aurora alerts via email or SMS through services like Aurora Alerts (App), which notify you when auroral activity is expected in your area.
6. Social Media and Community Groups:
Join local dedicated Aurora pages on Facebook. Aurora Australis (NZ), Southern Hemisphere Aurora Group are great
7. Satellite Weather Imagery and Tools:
Satellite imagery, such as those provided by NOAA's GOES satellites, can offer visual data on auroral activity and space weather conditions.
8. Mobile Apps:
There are several mobile apps designed for Aurora forecasts and alerts. Some popular ones include "My Aurora Forecast" and "Aurora Forecast."
Check out our blog on apps we love here!
By utilizing a combination of these resources, you can increase your chances of witnessing and photographing aurora displays. Keep in mind that auroral activity can be somewhat unpredictable, so it's beneficial to monitor these sources regularly, especially during periods of expected high solar activity.


BEST CAMERA SETTINGS
1. Camera Mode:
Use Manual mode (M) to have full control over the exposure settings.
2. Aperture:
Set your lens to its widest aperture (smallest f-number, e.g., f/2.8, f/3.5 etc) to allow as much light in as possible.
3. ISO Setting:
Start with a higher ISO setting (e.g., 1600, 3200, 6400) to increase the camera's sensitivity to light. Be mindful that higher ISOs can also increase the graininess or noise in the image, so you may need to find a balance.
4. Shutter Speed:
Begin with a shutter speed of about 5 to 15 seconds. Longer exposures will capture more light and detail but can also blur the movement of the aurora. If the aurora is very active and moving quickly, you will need to use shorter exposures to capture the shapes and patterns.
5. White Balance:
Set the white balance manually anywhere from 3000-6000ºk, (cooler-warmer) 4300ºk is a good mid-ground setting. Adjust to taste and remember if shooting in RAW mode, changing later in post-processing is no problem. NEVER shoot in Auto mode as we want to maintain consistency throughout the shoot, crucial if shooting panoramas.
6. Focus:
Set the focus to manual and adjust it to infinity (∞) if your lens has an infinity marker. It's often best to focus manually on a bright star to ensure sharpness, as autofocus will struggle in low-light conditions.
7. Lens:
Use a wide-angle lens to capture as much of the sky as possible. A lens with a focal length of 14-24mm on a full-frame camera, or 10-18mm on a crop sensor, is ideal.
8. File Format:
Shoot in RAW format if possible, this is crucial as this captures far more data than JPEG and provides greater flexibility in post-processing.
9. Stability:
Use a sturdy tripod to eliminate camera shake during the long exposures required for aurora photography.
10. Remote Shutter Release or Timer:
To further reduce camera shake, use a remote shutter release or the camera's built-in timer.
Be prepared to adjust your settings based on the aurora's speed and brightness. Review your shots and adjust the ISO, shutter speed, and aperture as needed. Remember, capturing the aurora can require patience and experimentation. Each auroral display is unique, so what works one night might need tweaking the next.
In conclusion, Aurora chasing is both exhilarating and frustrating. So many factors have to align to see or capture them. In our experience, prior knowledge of locations, understanding weather conditions, and aurora activity, play a crucial role in aurora chasing and will help you put yourself in the best possible location at the best time to help you capture all the magic!

Quick checklist for aurora chasing:
Clear skies, first and foremost find clear locations
Locations, facing south with unobstructed horizon view
Darkness, know when your sun & moon rise & set times are in your specific location.
Aurora activity, in real-time, monitor apps and websites, understand what each parameter means.
Cameras & Equipment, charged and ready to go
Warm clothes & snacks, be prepared for an all-nighter!
Have fun and remember to take a moment to take it all in.
